
Share This Blog With Other Pet Parents!
Cat Ear Cleaning Guide: Safely Clean Your Cat’s Ears
Caring for your feline friend goes beyond the basics of feeding and play; it extends into grooming practices that are often overlooked, such as ear cleaning. Many cat owners find themselves puzzled or even anxious about cleaning their cat’s ears, fearing they might cause discomfort or miss signs of underlying issues. This article demystifies the process of “How to Clean Cat’s Ears,” offering a step-by-step guide that ensures your cat’s ear health is maintained without stress for you or your pet.
From identifying the need for cleaning to selecting the right products, we cover all bases to ensure your cat remains happy, healthy, and free from ear-related discomforts.
What you’ll learn from this blog:

For all you need to know, download our
FREE Dental Guide
![]()
This blog is part of our Proactive Pet Parent series! This is just the beginning… To see more blogs, click here! Better yet, sign-up to our newsletter to receive these directly to your inbox each month.
Sign-up To The Proactive Pet Parent Newsletter
Recognising the Need for Ear Cleaning
Identifying the right time for ear cleaning is essential in maintaining your cat’s ear health. Cats are proficient self-groomers; however, their ears can harbour dirt, wax, and debris that may lead to discomfort or infections if not addressed. One of the first signs that it’s time to clean your cat’s ears is the presence of visible wax buildup or dirt inside the ear. This can often be spotted during regular petting sessions or grooming.
An unusual odour emanating from your cat’s ears is another clear indicator that a cleaning might be necessary. This odour could be a sign of yeast or bacterial infection, especially if accompanied by a dark, coffee ground-like discharge, which is often associated with ear mites.
Your cat exhibiting behaviours such as frequent head shaking or scratching at their ears more than usual can also signal discomfort due to dirty or infected ears. Such actions suggest that something inside the ear is causing irritation.
However, it’s critical to distinguish between the need for a simple cleaning and symptoms indicating a more serious condition requiring veterinary attention. Redness, persistent scratching, shaking, or discharge beyond a small amount of wax, particularly if it’s black or bloody, are signs that a vet visit is in order.
Approaching ear cleaning with caution and knowledge of these signs ensures your cat remains comfortable and helps prevent the escalation of potential ear health issues.
Preparing for Ear Cleaning
Before embarking on the task of cleaning your cat’s ears, gathering the right supplies and preparing the environment is crucial for a smooth process. You’ll need a vet-approved ear cleaner, cotton balls or gauze, and treats to reward your cat for their cooperation. It’s important to avoid using cotton swabs, as they can push debris further into the ear canal or damage the delicate structures inside the ear.
Creating a calm and comfortable setting is equally important. Choose a quiet room where your cat feels secure. If possible, have another person present to gently hold your cat, making them feel safe and preventing sudden movements. Familiarise your cat with the ear cleaning supplies by allowing them to sniff and inspect them before you begin, which can help reduce anxiety.
Before applying any cleaner, examine your cat’s ears for any signs of severe infection or discomfort. If you notice excessive redness, swelling, or discharge, it’s best to consult a veterinarian rather than proceeding with cleaning, as these could be signs of an underlying condition that requires professional treatment.
By preparing thoroughly and approaching the process with patience and care, you can ensure that ear cleaning is a stress-free experience for both you and your cat. The goal is to maintain your cat’s ear health while keeping the experience as positive as possible.
Step-by-Step Guide to Cleaning Your Cat’s Ears
Cleaning your cat’s ears does not have to be a daunting task. With the right approach and gentle handling, it can be a stress-free experience for both you and your pet. Here’s a step-by-step guide to effectively cleaning your cat’s ears:
- Preparation: Ensure all your supplies are within reach. You’ll need a vet-approved ear cleaning solution, cotton balls or gauze pads, and treats to reward your cat. Start by holding your cat comfortably in your lap or on a table, using a towel or blanket for added comfort if necessary.
- Examination: Gently fold back each ear and examine the interior for signs of excessive wax buildup, debris, or any signs of infection such as redness, swelling, or odor. If these signs are present, it’s best to consult your veterinarian.
- Applying the Cleaner: Apply the recommended amount of ear cleaner into your cat’s ear canal. Be careful not to insert the applicator tip directly into the ear canal. Gently massage the base of the ear for about 20-30 seconds to help loosen any debris and wax inside.
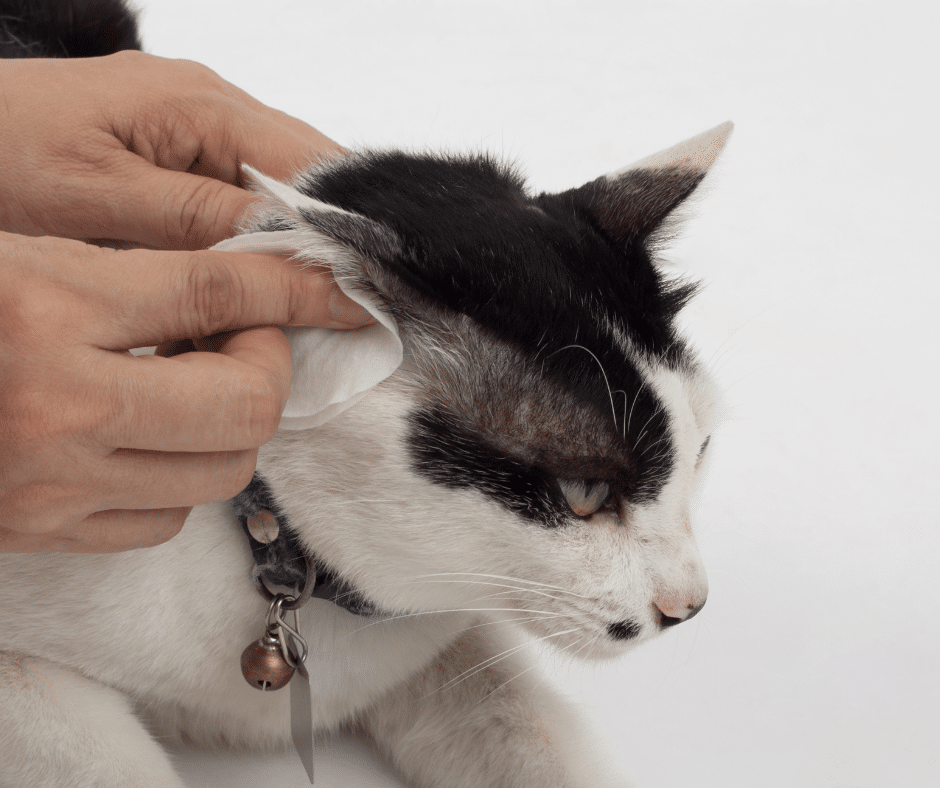
- Wiping Away Debris: After massaging, allow your cat to shake its head. This helps bring softened wax and debris to the outer part of the ear canal. Next, use a cotton ball or gauze pad to gently wipe away any discharge or excess cleaner from the ear’s outer folds. Avoid inserting anything deep into the ear canal.
- Repeat if Necessary: If the ears are particularly dirty, you may need to repeat the cleaning process. However, avoid over-cleaning, as this can lead to irritation.
- Reward Your Cat: After cleaning both ears, reward your cat with treats and affection to help create a positive association with the ear cleaning process.
The key to successful ear cleaning is to be gentle and patient. If at any point your cat shows signs of distress or discomfort, take a break and try again later, or consult your veterinarian for further guidance.
Aftercare, Monitoring, and Prevention Post-Ear Cleaning
Following a thorough ear cleaning session, the next steps involve careful aftercare and monitoring to ensure your cat’s ears remain healthy. Observe your cat for any signs of irritation or infection in the days after cleaning, such as increased scratching, shaking of the head, or any unusual discharge. These could indicate that further examination by a veterinarian is necessary. It’s important to avoid over-cleaning, which can lead to irritation or exacerbate ear problems. As a rule of thumb, cleaning once a month is adequate for most cats, but this can vary based on individual needs and veterinary advice.
Recognising when to seek professional help is paramount. Symptoms like persistent odour, excessive scratching, visible discomfort, or unusual behaviour should prompt a visit to the vet. These signs may indicate underlying issues such as infections, mites, or allergies requiring specialised treatment. Early intervention and regular veterinary check-ups play a significant role in preventing more serious ear health issues.
To prevent ear problems in cats, incorporate regular ear checks into your grooming routine, maintain a clean living environment, and consider diet adjustments that support overall health. Additionally, minimising stress and ensuring your cat has a calm environment can positively impact their overall well-being, including ear health.
We hope this step-by-step guide has given you the confidence to clean your cat ears safely and has brought awareness to the signs to watch out for any potential problems. If you have any questions or concerns about your cats health, contact MustCare Vets. We’re here to help and provide the best care possible for your feline friends.

